Quick Start
You know Django. You’ve done the official tutorial. Now you want to build something you can show to users - not just a polls app.
This guide walks you through building a Viewflow app from scratch. You’ll have a working site with login, navigation, and user management in about 15 minutes.
Set Up the Environment
Create a virtual environment:
python3 -m venv .venv
source .venv/bin/activate
Viewflow needs Python 3.8+ and Django 4.0+.
Install the open source package:
pip install django-viewflow
Or, if you have Viewflow PRO:
pip install django-viewflow-pro --extra-index-url https://pypi.viewflow.io/<licence_id>/simple/
Create the Project
Create a Django project and an app:
django-admin startproject demo .
./manage.py startapp helloworld
Your folder structure:
demo/
├── asgi.py
├── __init__.py
├── settings.py
├── urls.py
└── wsgi.py
helloworld/
├── admin.py
├── apps.py
├── __init__.py
├── migrations/
│   └── __init__.py
├── models.py
├── tests.py
└── views.py
manage.py
Configure Settings
Open demo/settings.py and add Viewflow to your installed apps:
INSTALLED_APPS = [
    ...
    'viewflow',
    'helloworld',
]
Set Up URLs
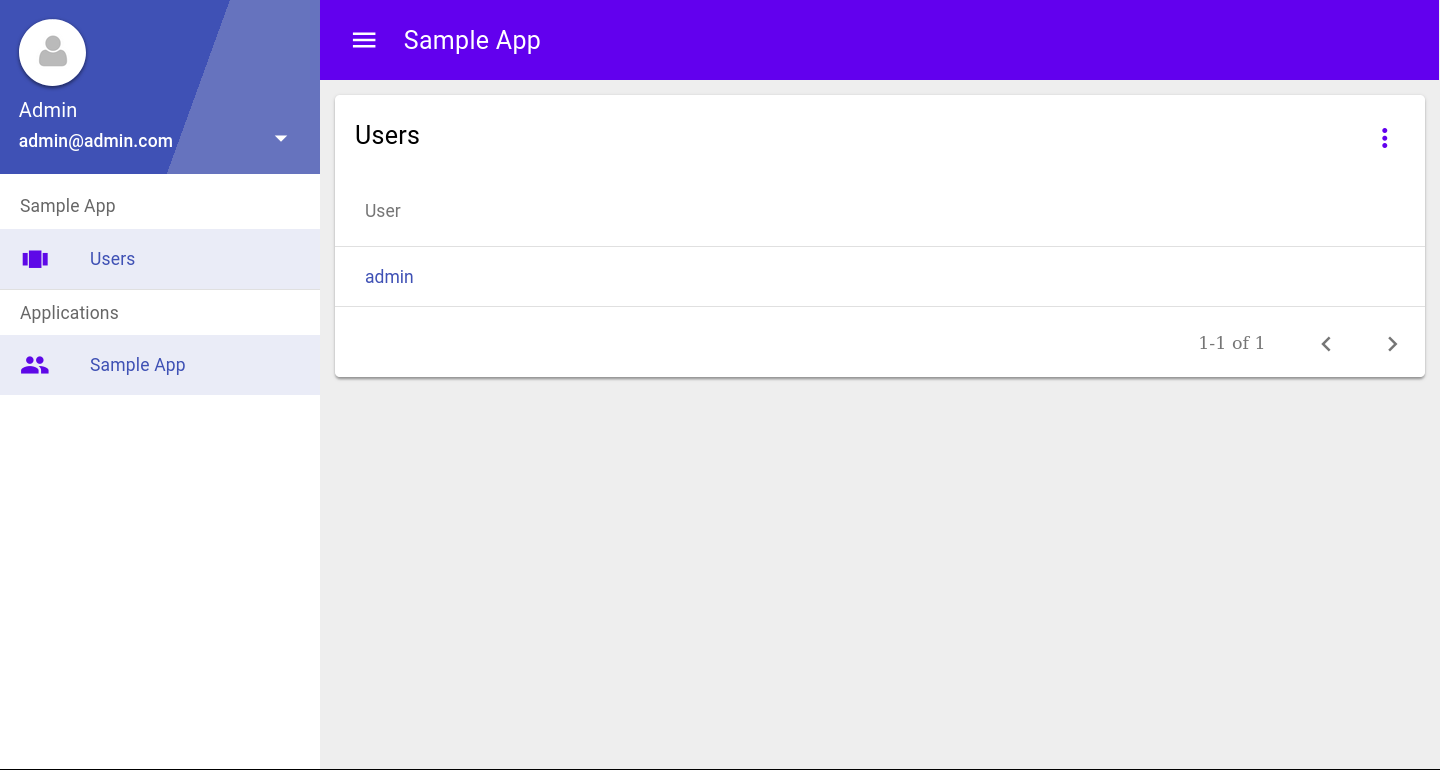
Viewflow uses Viewsets - classes that group related views together. Think of them as building blocks for your site.
Open demo/urls.py and add:
from django.urls import path
from django.contrib.auth.models import User
from viewflow.contrib.auth import AuthViewset
from viewflow.urls import Application, Site, ModelViewset


site = Site(title="ACME Corp", viewsets=[
    Application(
        title='Sample App',
        icon='people',
        app_name='sample',
        viewsets=[
            ModelViewset(model=User),
        ]
    ),
])

urlpatterns = [
    path('accounts/', AuthViewset(with_profile_view=False).urls),
    path('', site.urls),
]
This creates:
- A site with one application
- CRUD views for the Django User model
- A login page
Run the App
Apply migrations and create an admin user:
./manage.py migrate
./manage.py createsuperuser
Start the server:
./manage.py runserver
Open http://127.0.0.1:8000 in your browser.
You have a working app. Now you can add your own models, workflows, and views.